1. The complete roadmap
Do not try to memorize React. Build a mental model, type the examples, deliberately break them, and repair them.
Zero
Node.js, Vite, Hello World, JSX and components.
Foundation
Props, state, events, conditional rendering, lists and forms.
Power
Hooks, data fetching, routing, reusable logic and context.
Infinity
Redux Toolkit, architecture, testing, optimization and deployment.
Prerequisites
Comfort with variables, functions, arrays, objects, destructuring, modules, promises and
async/await. React is JavaScript with a component model; weak JavaScript creates mysterious
React.
2. Installation → a completely clean Hello World
We use Vite, a fast build tool. In a terminal:
npm create vite@latest react-zero-infinity -- --template react
cd react-zero-infinity
npm install
npm run dev
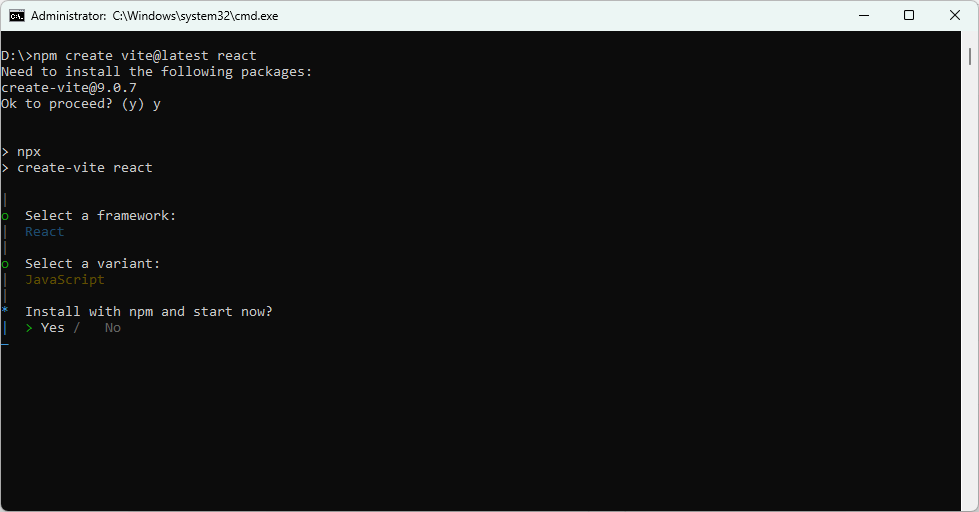
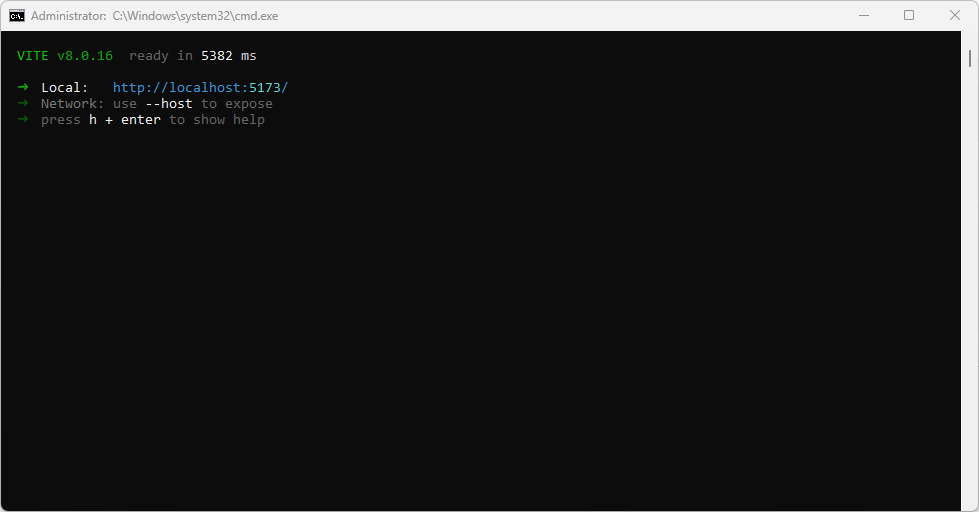
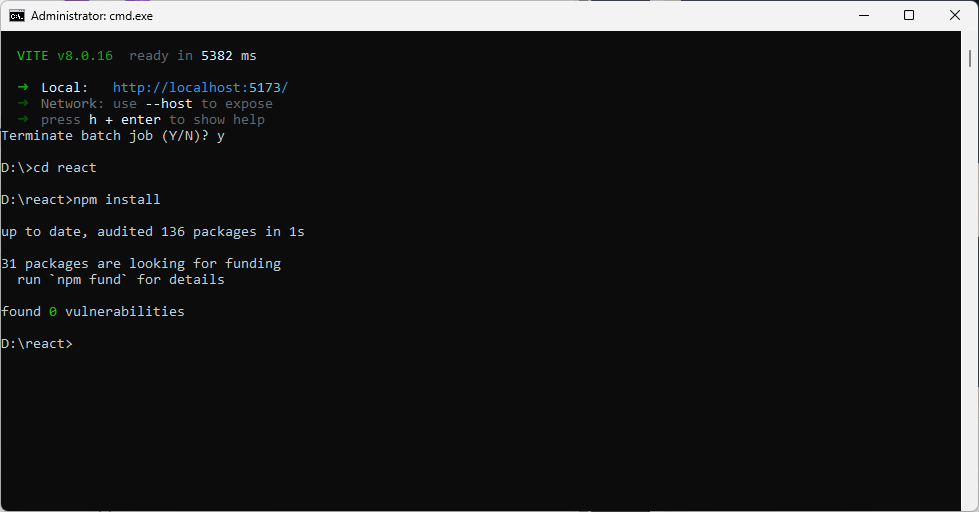
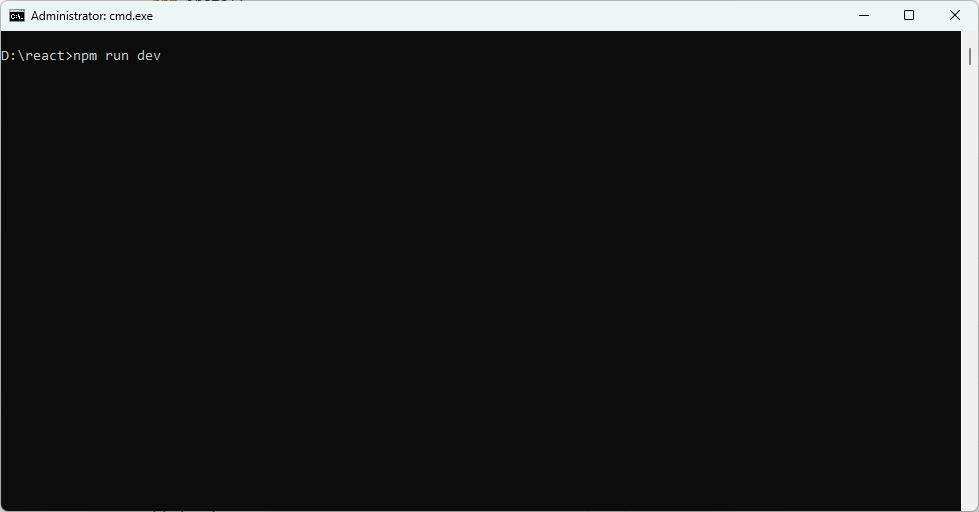
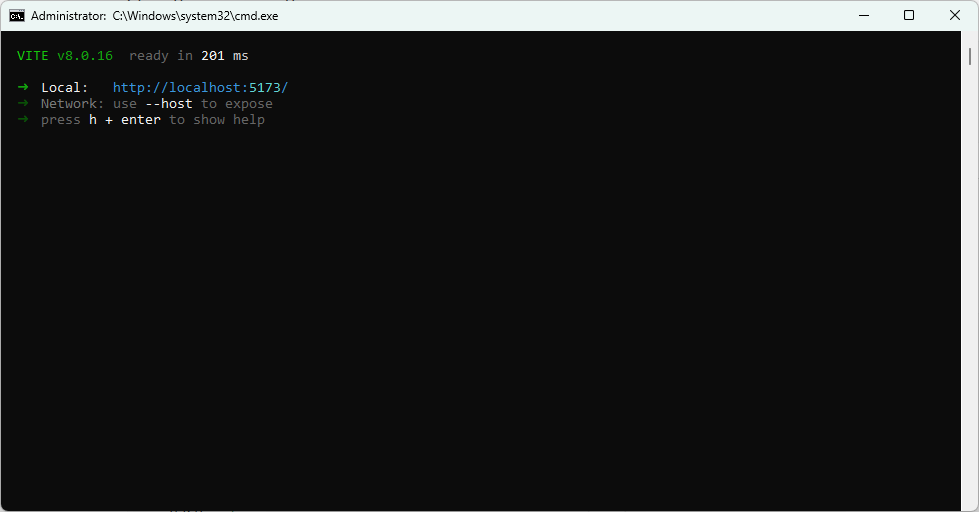
Installation screenshots
Follow the original terminal screenshots below. They show the Vite prompts, framework and variant selection, package installation, and the first development-server run.
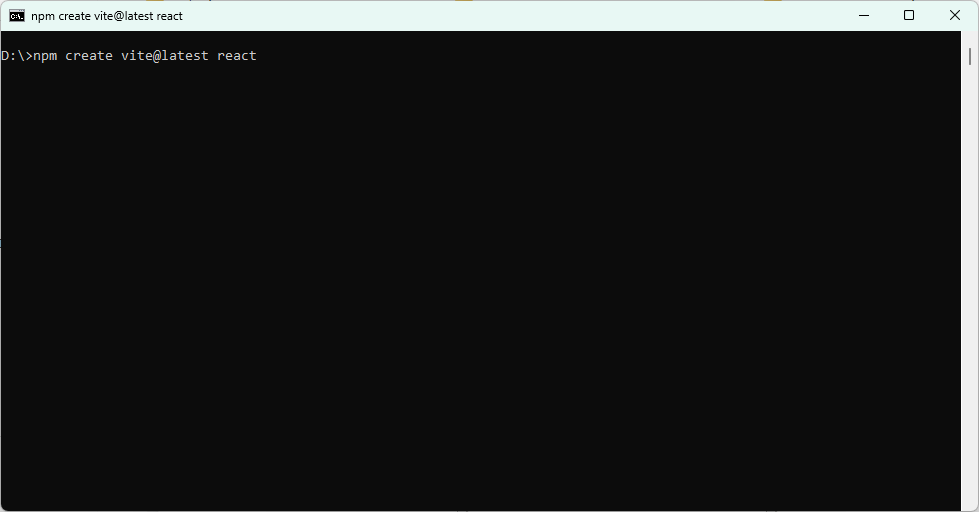
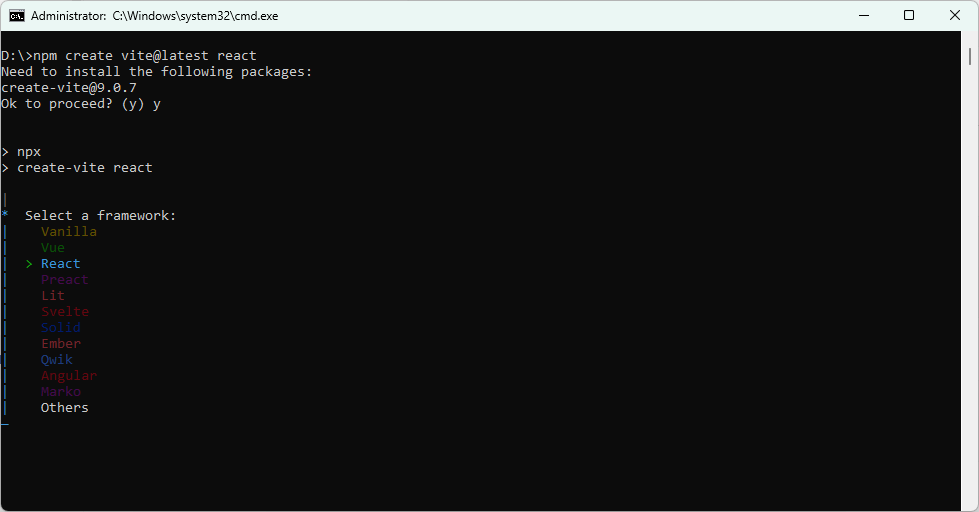
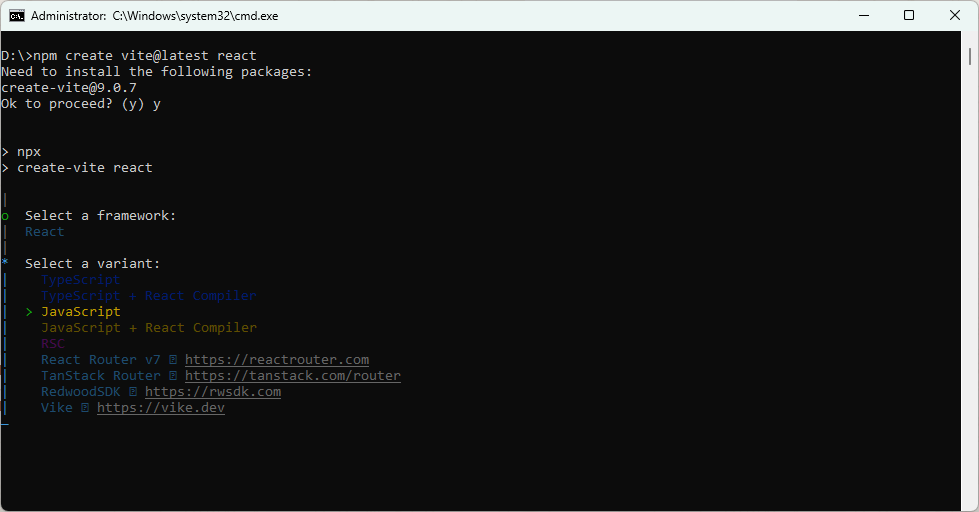
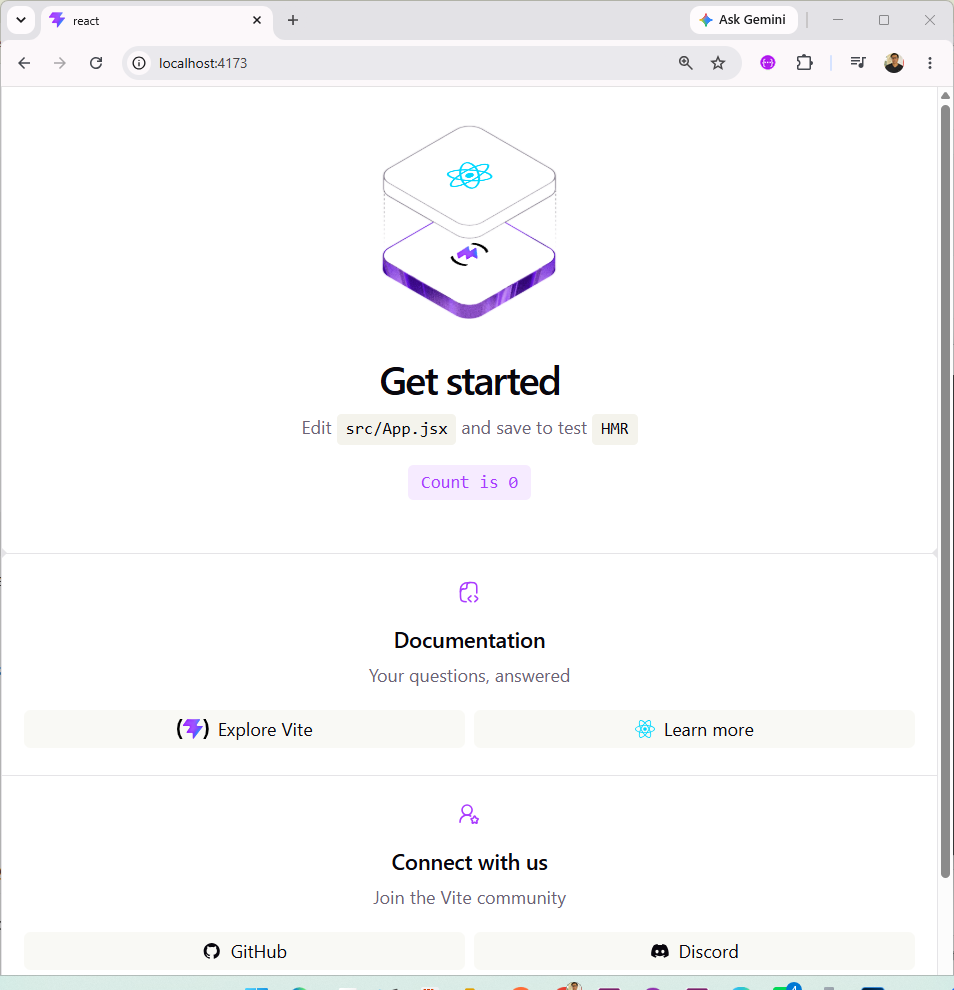
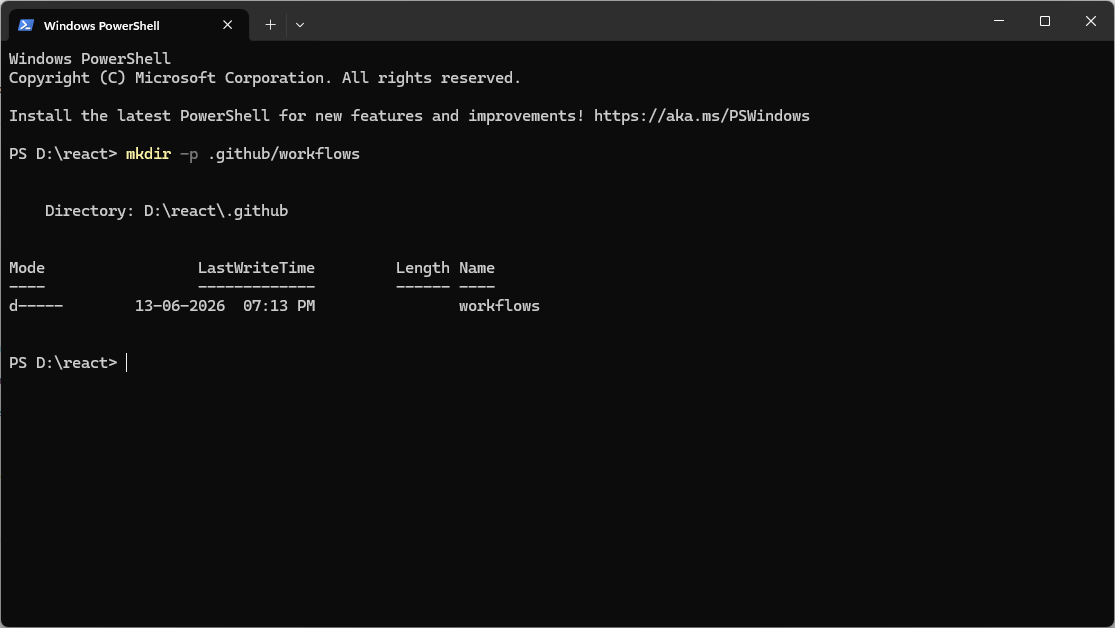
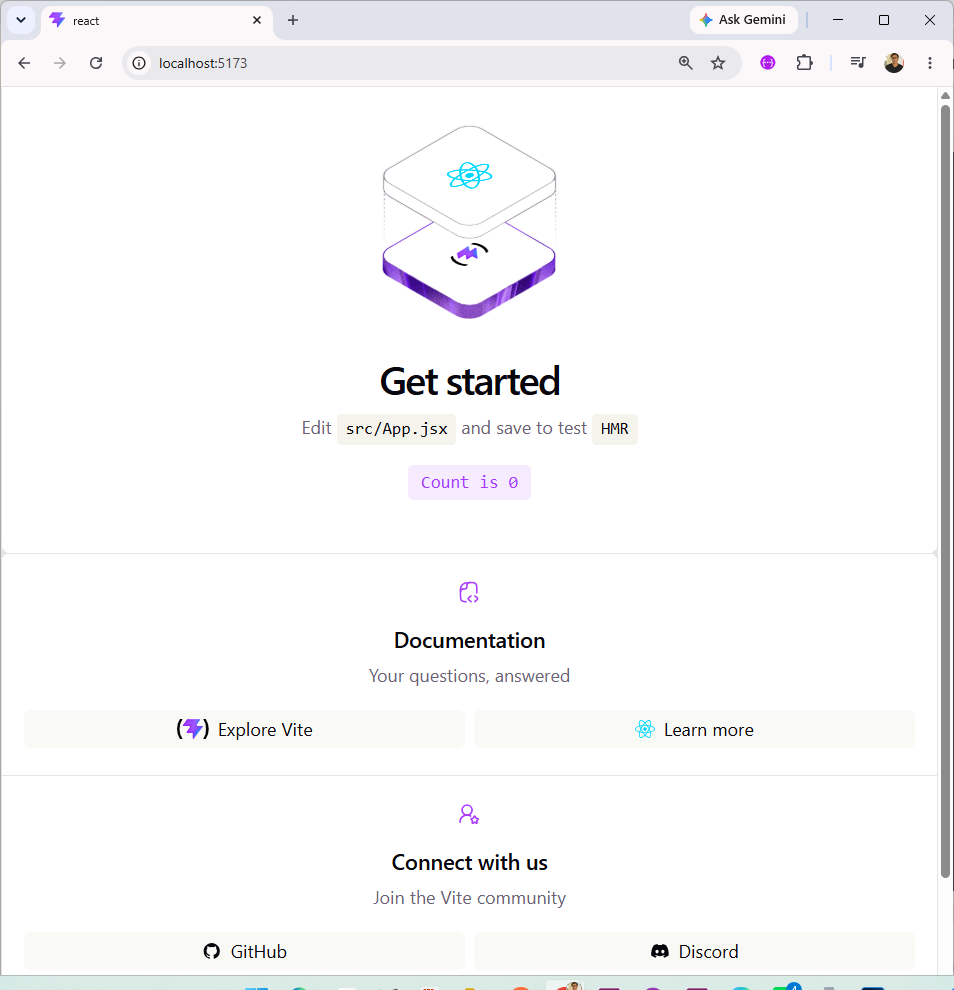
Open the local address shown in the terminal. Now remove the demonstration content. Delete
src/assets/react.svg and empty src/App.css. Replace src/App.jsx with:
function App() {
  return <h1>Hello World</h1>
}

export default App
Replace src/index.css with:
* { box-sizing: border-box; }
body {
  margin: 0;
  font-family: Arial, sans-serif;
  padding: 2rem;
}
Keep src/main.jsx simple:
import { StrictMode } from 'react'
import { createRoot } from 'react-dom/client'
import './index.css'
import App from './App.jsx'

createRoot(document.getElementById('root')).render(
  <StrictMode>
    <App />
  </StrictMode>
)StrictMode adds development checks. It may intentionally run some logic twice in development
to reveal unsafe side effects; production does not do this.
Full code at every stage
Use this as the practical path through the course. At every stage, replace the named files completely with
the code shown. Never mix a new stage with fragments left over from an earlier one. Keep
src/main.jsx and src/index.css from Stage 1 unless a later stage explicitly
replaces them.
npm run dev, test it in
the browser, and only then open the next stage.Stage 1 — Clean Vite project: Hello World (complete files)
src/App.jsx
function App() {
  return <h1>Hello World</h1>
}

export default App
src/main.jsx
import { StrictMode } from 'react'
import { createRoot } from 'react-dom/client'
import './index.css'
import App from './App.jsx'

createRoot(document.getElementById('root')).render(
  <StrictMode>
    <App />
  </StrictMode>
)
src/index.css
* { box-sizing: border-box; }

body {
  margin: 0;
  padding: 2rem;
  font-family: Arial, sans-serif;
  color: #142033;
  background: #eef8ff;
}

button, input { font: inherit; }
Stage 2 — Components and props (complete files)
src/Greeting.jsx
function Greeting({ name, subject }) {
  return (
    <article className="card">
      <h2>Hello, {name}!</h2>
      <p>Welcome to {subject}.</p>
    </article>
  )
}

export default Greeting
src/App.jsx
import Greeting from './Greeting.jsx'

function App() {
  return (
    <main>
      <h1>React Students</h1>
      <Greeting name="Ananya" subject="React" />
      <Greeting name="Ravi" subject="Components" />
    </main>
  )
}

export default App
Add to src/index.css
.card {
  max-width: 520px;
  margin: 1rem 0;
  padding: 1rem;
  border: 1px solid #b9d9ef;
  border-radius: 12px;
  background: white;
}
Stage 3 — State, events and conditional rendering (complete App)
src/App.jsx
import { useState } from 'react'

function App() {
  const [count, setCount] = useState(0)

  return (
    <main>
      <h1>Practice Counter</h1>
      <p>Completed questions: <strong>{count}</strong></p>
      <p>{count >= 5 ? 'Excellent progress!' : 'Complete five questions.'}</p>
      <button onClick={() => setCount(value => value + 1)}>+1</button>
      <button onClick={() => setCount(value => Math.max(0, value - 1))}>-1</button>
      <button onClick={() => setCount(0)}>Reset</button>
    </main>
  )
}

export default App
Stage 4 — Controlled form and list (complete App)
src/App.jsx
import { useState } from 'react'

function App() {
  const [name, setName] = useState('')
  const [students, setStudents] = useState([])

  function addStudent(event) {
    event.preventDefault()
    const cleanName = name.trim()
    if (!cleanName) return
    setStudents(current => [
      ...current,
      { id: crypto.randomUUID(), name: cleanName }
    ])
    setName('')
  }

  function removeStudent(id) {
    setStudents(current => current.filter(student => student.id !== id))
  }

  return (
    <main>
      <h1>Student List</h1>
      <form onSubmit={addStudent}>
        <label htmlFor="name">Student name</label>
        <input id="name" value={name}
          onChange={event => setName(event.target.value)} />
        <button type="submit">Add</button>
      </form>
      {students.length === 0 ? <p>No students yet.</p> : (
        <ul>{students.map(student => (
          <li key={student.id}>
            {student.name}{' '}
            <button onClick={() => removeStudent(student.id)}>Delete</button>
          </li>
        ))}</ul>
      )}
    </main>
  )
}

export default App
Stage 5 — useEffect and Fetch API (complete App)
src/App.jsx
import { useEffect, useState } from 'react'

function App() {
  const [users, setUsers] = useState([])
  const [status, setStatus] = useState('loading')
  const [error, setError] = useState('')

  useEffect(() => {
    const controller = new AbortController()

    async function loadUsers() {
      try {
        setStatus('loading')
        const response = await fetch(
          'https://jsonplaceholder.typicode.com/users',
          { signal: controller.signal }
        )
        if (!response.ok) throw new Error(`HTTP ${response.status}`)
        setUsers(await response.json())
        setStatus('success')
      } catch (problem) {
        if (problem.name !== 'AbortError') {
          setError(problem.message)
          setStatus('error')
        }
      }
    }

    loadUsers()
    return () => controller.abort()
  }, [])

  return (
    <main>
      <h1>Users from Fetch</h1>
      {status === 'loading' && <p>Loading…</p>}
      {status === 'error' && <p role="alert">Error: {error}</p>}
      {status === 'success' && (
        <ul>{users.map(user => <li key={user.id}>{user.name}</li>)}</ul>
      )}
    </main>
  )
}

export default App
Stage 6 — Axios with a reusable service (complete files)
npm install axiossrc/services/api.js
import axios from 'axios'

export const api = axios.create({
  baseURL: 'https://jsonplaceholder.typicode.com',
  timeout: 8000
})
src/App.jsx
import { useEffect, useState } from 'react'
import { api } from './services/api.js'

function App() {
  const [posts, setPosts] = useState([])
  const [loading, setLoading] = useState(true)
  const [error, setError] = useState('')

  useEffect(() => {
    const controller = new AbortController()
    api.get('/posts?_limit=8', { signal: controller.signal })
      .then(response => setPosts(response.data))
      .catch(problem => {
        if (problem.code !== 'ERR_CANCELED') setError(problem.message)
      })
      .finally(() => setLoading(false))
    return () => controller.abort()
  }, [])

  return (
    <main>
      <h1>Posts with Axios</h1>
      {loading && <p>Loading…</p>}
      {error && <p role="alert">{error}</p>}
      <ul>{posts.map(post => <li key={post.id}>{post.title}</li>)}</ul>
    </main>
  )
}

export default App
Stage 7 — React Router (complete files)
npm install react-router-domsrc/main.jsx
import { StrictMode } from 'react'
import { createRoot } from 'react-dom/client'
import { BrowserRouter } from 'react-router-dom'
import './index.css'
import App from './App.jsx'

createRoot(document.getElementById('root')).render(
  <StrictMode>
    <BrowserRouter><App /></BrowserRouter>
  </StrictMode>
)
src/App.jsx
import { NavLink, Route, Routes, useParams } from 'react-router-dom'

function Home() { return <h2>Home</h2> }
function Courses() { return <h2>Courses</h2> }
function Course() {
  const { courseId } = useParams()
  return <h2>Course: {courseId}</h2>
}
function NotFound() { return <h2>Page not found</h2> }

function App() {
  return (
    <main>
      <h1>Learning Portal</h1>
      <nav>
        <NavLink to="/">Home</NavLink> {' | '}
        <NavLink to="/courses">Courses</NavLink> {' | '}
        <NavLink to="/courses/react">React</NavLink>
      </nav>
      <Routes>
        <Route path="/" element={<Home />} />
        <Route path="/courses" element={<Courses />} />
        <Route path="/courses/:courseId" element={<Course />} />
        <Route path="*" element={<NotFound />} />
      </Routes>
    </main>
  )
}

export default App
Stage 8 — Context plus useReducer (complete App)
src/App.jsx
import { createContext, useContext, useReducer } from 'react'

const TasksContext = createContext(null)
const DispatchContext = createContext(null)

function reducer(tasks, action) {
  if (action.type === 'add') {
    return [...tasks, { id: crypto.randomUUID(), text: action.text, done: false }]
  }
  if (action.type === 'toggle') {
    return tasks.map(task => task.id === action.id
      ? { ...task, done: !task.done } : task)
  }
  if (action.type === 'delete') return tasks.filter(task => task.id !== action.id)
  throw new Error(`Unknown action: ${action.type}`)
}

function TaskList() {
  const tasks = useContext(TasksContext)
  const dispatch = useContext(DispatchContext)
  return <ul>{tasks.map(task => <li key={task.id}>
    <label><input type="checkbox" checked={task.done}
      onChange={() => dispatch({ type: 'toggle', id: task.id })} />
      {task.text}</label>
    <button onClick={() => dispatch({ type: 'delete', id: task.id })}>Delete</button>
  </li>)}</ul>
}

function App() {
  const [tasks, dispatch] = useReducer(reducer, [])
  function submit(event) {
    event.preventDefault()
    const text = new FormData(event.currentTarget).get('task').trim()
    if (text) dispatch({ type: 'add', text })
    event.currentTarget.reset()
  }
  return <TasksContext.Provider value={tasks}>
    <DispatchContext.Provider value={dispatch}>
      <main><h1>Tasks</h1>
        <form onSubmit={submit}><input name="task" required /><button>Add</button></form>
        <TaskList />
      </main>
    </DispatchContext.Provider>
  </TasksContext.Provider>
}

export default App
Stage 9 — Redux Toolkit (complete files)
npm install @reduxjs/toolkit react-reduxsrc/app/store.js
import { configureStore } from '@reduxjs/toolkit'
import counterReducer from '../features/counter/counterSlice.js'

export const store = configureStore({
  reducer: { counter: counterReducer }
})
src/features/counter/counterSlice.js
import { createSlice } from '@reduxjs/toolkit'

const counterSlice = createSlice({
  name: 'counter',
  initialState: { value: 0 },
  reducers: {
    increment: state => { state.value += 1 },
    decrement: state => { state.value -= 1 },
    reset: state => { state.value = 0 }
  }
})

export const { increment, decrement, reset } = counterSlice.actions
export default counterSlice.reducer
src/main.jsx
import { StrictMode } from 'react'
import { createRoot } from 'react-dom/client'
import { Provider } from 'react-redux'
import { store } from './app/store.js'
import './index.css'
import App from './App.jsx'

createRoot(document.getElementById('root')).render(
  <StrictMode><Provider store={store}><App /></Provider></StrictMode>
)
src/App.jsx
import { useDispatch, useSelector } from 'react-redux'
import { decrement, increment, reset } from './features/counter/counterSlice.js'

function App() {
  const count = useSelector(state => state.counter.value)
  const dispatch = useDispatch()
  return <main>
    <h1>Redux Counter: {count}</h1>
    <button onClick={() => dispatch(increment())}>+1</button>
    <button onClick={() => dispatch(decrement())}>-1</button>
    <button onClick={() => dispatch(reset())}>Reset</button>
  </main>
}

export default App
Stage 10 — Test the app (complete test and configuration)
npm install -D vitest jsdom @testing-library/react @testing-library/jest-dom @testing-library/user-eventvite.config.js
import { defineConfig } from 'vite'
import react from '@vitejs/plugin-react'

export default defineConfig({
  plugins: [react()],
  test: { environment: 'jsdom', setupFiles: './src/test/setup.js' }
})
src/test/setup.js
import '@testing-library/jest-dom/vitest'src/App.test.jsx
import { render, screen } from '@testing-library/react'
import userEvent from '@testing-library/user-event'
import { Provider } from 'react-redux'
import { store } from './app/store.js'
import App from './App.jsx'

test('increments the Redux counter', async () => {
  const user = userEvent.setup()
  render(<Provider store={store}><App /></Provider>)
  await user.click(screen.getByRole('button', { name: '+1' }))
  expect(screen.getByRole('heading')).toHaveTextContent('Redux Counter: 1')
})
package.json script to add
"scripts": {
  "dev": "vite",
  "build": "vite build",
  "lint": "eslint .",
  "preview": "vite preview",
  "test": "vitest"
}
Stage 11 — Publish to GitHub Pages (complete deployment files)
This snapshot assumes the repository is named react-zero-infinity. Replace the name if
yours is different.
vite.config.js
import { defineConfig } from 'vite'
import react from '@vitejs/plugin-react'

export default defineConfig({
  base: '/react-zero-infinity/',
  plugins: [react()],
  test: { environment: 'jsdom', setupFiles: './src/test/setup.js' }
})
.github/workflows/deploy.yml
name: Deploy React to GitHub Pages

on:
  push:
    branches: [main]
  workflow_dispatch:

permissions:
  contents: read
  pages: write
  id-token: write

concurrency:
  group: pages
  cancel-in-progress: true

jobs:
  build:
    runs-on: ubuntu-latest
    steps:
      - uses: actions/checkout@v4
      - uses: actions/setup-node@v4
        with:
          node-version: 22
          cache: npm
      - run: npm ci
      - run: npm run build
      - uses: actions/configure-pages@v5
      - uses: actions/upload-pages-artifact@v3
        with:
          path: dist
  deploy:
    environment:
      name: github-pages
      url: ${{ steps.deployment.outputs.page_url }}
    runs-on: ubuntu-latest
    needs: build
    steps:
      - name: Deploy
        id: deployment
        uses: actions/deploy-pages@v4
Commands
npm run test -- --run
npm run build
git init
git add .
git commit -m "Complete React course project"
git branch -M main
git remote add origin https://github.com/USERNAME/react-zero-infinity.git
git push -u origin mainmain republishes the app.3. The React mental model
Component
A JavaScript function that returns user interface.
Props
Read-only inputs passed from parent to child.
State
A component's memory. Changing it requests a render.
Render
React calls components to calculate what the screen should show.
4. JavaScript XML (JSX)
JSX looks like HTML but becomes JavaScript. Use className, camelCase event names and braces
for JavaScript expressions.
const student = { name: 'Avinash', score: 92 }

function App() {
  return (
    <main className="app">
      <h1>Welcome, {student.name}</h1>
      <p>Score: {student.score}</p>
    </main>
  )
}
Rules
- Return one parent element or a fragment
<>...</>. - Close every tag.
- Put statements before
return; put expressions inside braces. - Use
style={{ color: 'navy' }}for inline styles.
5. Components and props
Example 1: a reusable greeting
function Greeting({ name, subject = 'React' }) {
  return <h2>Hello {name}. Let us learn {subject}.</h2>
}

export default function App() {
  return (
    <>
      <Greeting name="Saurabh" />
      <Greeting name="Avinash" subject="Redux" />
    </>
  )
}
Example 2: composition with children
function Card({ title, children }) {
  return (
    <article className="card">
      <h2>{title}</h2>
      {children}
    </article>
  )
}

<Card title="Lesson 1"><p>Components can contain components.</p></Card>6. Events and state
import { useState } from 'react'

export default function Counter() {
  const [count, setCount] = useState(0)

  function increase() {
    setCount(current => current + 1)
  }

  return <button onClick={increase}>Count: {count}</button>
}
Pass a function to an event: onClick={increase}, not onClick={increase()}. When
the next state depends on the previous state, use the updater form.
// Wrong: mutates the existing array
students.push(newStudent)

// Correct: creates a new array
setStudents(current => [...current, newStudent])
7. Conditional rendering and lists
function Status({ loggedIn }) {
  return loggedIn ? <p>Dashboard</p> : <p>Please sign in</p>
}

const students = [
  { id: 1, name: 'Champak' },
  { id: 2, name: 'Saurabh' }
]

function StudentList() {
  return (
    <ul>
      {students.map(student => (
        <li key={student.id}>{student.name}</li>
      ))}
    </ul>
  )
}
A key identifies an item between renders. Prefer a stable database ID; avoid an array index when items can move, be deleted or inserted.
8. Controlled forms
One field
import { useState } from 'react'

function NameForm() {
  const [name, setName] = useState('')

  function submit(event) {
    event.preventDefault()
    alert(`Hello ${name}`)
  }

  return (
    <form onSubmit={submit}>
      <input value={name} onChange={e => setName(e.target.value)} />
      <button>Submit</button>
    </form>
  )
}
Several fields
const [form, setForm] = useState({ name: '', email: '' })

function change(event) {
  const { name, value } = event.target
  setForm(current => ({ ...current, [name]: value }))
}

<input name="name" value={form.name} onChange={change} />
<input name="email" value={form.email} onChange={change} />
9. Hooks: rules and map
Hooks let function components use React features. Call hooks only at the top level of a component or custom hook—not inside loops, conditions or ordinary functions.
| Need | Hook |
|---|---|
| Local memory | useState, useReducer |
| Synchronize outside React | useEffect, useEffectEvent, useLayoutEffect,
useInsertionEffect |
| Share/read context | useContext |
| DOM or mutable value | useRef, useImperativeHandle |
| Performance | useMemo, useCallback, useTransition,
useDeferredValue |
| IDs/external stores/debugging | useId, useSyncExternalStore, useDebugValue |
| React 19 actions/resources | useActionState, useOptimistic, use,
useFormStatus (React DOM) |
10. Core hooks—two examples each
useState — local component memory
Example A: counter
const [count, setCount] = useState(0)
<button onClick={() => setCount(c => c + 1)}>{count}</button>
Example B: immutable object update
const [student, setStudent] = useState({ name: 'Saurabh', score: 80 })
setStudent(s => ({ ...s, score: s.score + 5 }))
useEffect — synchronize with an external system
Example A: document title
useEffect(() => {
  document.title = `Count: ${count}`
}, [count])
Example B: timer with cleanup
useEffect(() => {
  const id = setInterval(() => setSeconds(s => s + 1), 1000)
  return () => clearInterval(id)
}, [])
An empty dependency array means “connect after mounting, disconnect on unmount.” Include every reactive value used by the effect. Do not use an effect to calculate data that can be calculated during render.
useContext — read shared nearby data
Example A: theme
const ThemeContext = createContext('light')

function App() {
  return <ThemeContext value="dark"><Toolbar /></ThemeContext>
}
function Toolbar() {
  const theme = useContext(ThemeContext)
  return <button className={theme}>Save</button>
}
Example B: signed-in user
const UserContext = createContext(null)
function Profile() {
  const user = useContext(UserContext)
  return <p>{user ? user.name : 'Guest'}</p>
}
useReducer — structured state transitions
Example A: counter actions
function reducer(state, action) {
  if (action.type === 'increment') return { count: state.count + 1 }
  if (action.type === 'reset') return { count: 0 }
  throw Error('Unknown action')
}
const [state, dispatch] = useReducer(reducer, { count: 0 })
<button onClick={() => dispatch({ type: 'increment' })}>{state.count}</button>
Example B: task list
function tasksReducer(tasks, action) {
  switch (action.type) {
    case 'added': return [...tasks, { id: crypto.randomUUID(), text: action.text }]
    case 'deleted': return tasks.filter(t => t.id !== action.id)
    default: throw Error('Unknown action')
  }
}
useRef — DOM access or mutable value without rendering
Example A: focus an input
const inputRef = useRef(null)
<input ref={inputRef} />
<button onClick={() => inputRef.current.focus()}>Focus</button>
Example B: retain a timer ID
const timerRef = useRef(null)
function start() { timerRef.current = setInterval(tick, 1000) }
function stop() { clearInterval(timerRef.current) }
11. Advanced and specialized hooks—two examples each
useMemo — cache an expensive calculated value
Example A: filtered list
const visible = useMemo(
  () => products.filter(p => p.name.includes(query)),
  [products, query]
)
Example B: expensive statistics
const report = useMemo(() => calculateReport(scores), [scores])It is a performance tool, not a correctness tool.
useCallback — cache a function identity
Example A: memoized child callback
const addTask = useCallback(text => {
  setTasks(ts => [...ts, { id: crypto.randomUUID(), text }])
}, [])
Example B: stable fetch function
const loadUser = useCallback(async () => {
  const response = await fetch(`/api/users/${userId}`)
  setUser(await response.json())
}, [userId])
useLayoutEffect — measure layout before paint
Example A: tooltip position
useLayoutEffect(() => {
  setHeight(ref.current.getBoundingClientRect().height)
}, [])
Example B: restore scroll immediately
useLayoutEffect(() => {
  listRef.current.scrollTop = savedScroll
}, [savedScroll])
Prefer useEffect; layout effects block painting.
useEffectEvent — non-reactive logic called from an effect
Example A: log a visit with the latest cart size
const onVisit = useEffectEvent(visitedUrl => {
  logVisit(visitedUrl, cart.length)
})

useEffect(() => {
  onVisit(url)
}, [url])
Example B: connection notification uses the latest theme
const onConnected = useEffectEvent(() => {
  showNotification('Connected', theme)
})

useEffect(() => {
  const connection = createConnection(roomId)
  connection.on('connected', onConnected)
  connection.connect()
  return () => connection.disconnect()
}, [roomId])
Effect Events are called only from effects. They let the effect react to one value while still reading the latest version of another value.
useImperativeHandle — expose a small ref API
Example A: focus
const FancyInput = forwardRef(function FancyInput(props, ref) {
  const input = useRef(null)
  useImperativeHandle(ref, () => ({ focus: () => input.current.focus() }))
  return <input ref={input} />
})
Example B: dialog controls
useImperativeHandle(ref, () => ({
  open: () => dialog.current.showModal(),
  close: () => dialog.current.close()
}), [])
useDebugValue — label custom hooks in React DevTools
Example A: online status
function useOnlineStatus() {
  const online = useSyncExternalStore(subscribe, getSnapshot)
  useDebugValue(online ? 'Online' : 'Offline')
  return online
}
Example B: delayed formatting
useDebugValue(date, value => value.toLocaleDateString())useId — stable accessibility IDs
Example A: label and input
const id = useId()
<label htmlFor={id}>Email</label>
<input id={id} />
Example B: related hint
const id = useId()
<input aria-describedby={`${id}-hint`} />
<small id={`${id}-hint`}>At least 8 characters</small>
Do not use useId for list keys.
useTransition — mark non-urgent updates
Example A: slow tab switch
const [isPending, startTransition] = useTransition()
startTransition(() => setTab(nextTab))
Example B: large search result update
setInput(value)
startTransition(() => setQuery(value))
return isPending && <p>Updating…</p>
useDeferredValue — let a slow view lag behind
Example A: search results
const deferredQuery = useDeferredValue(query)
<Results query={deferredQuery} />
Example B: chart
const deferredData = useDeferredValue(data)
const stale = deferredData !== data
<Chart data={deferredData} style={{ opacity: stale ? .5 : 1 }} />
useSyncExternalStore — safely subscribe outside React
Example A: browser online status
const online = useSyncExternalStore(
  callback => {
    addEventListener('online', callback)
    addEventListener('offline', callback)
    return () => {
      removeEventListener('online', callback)
      removeEventListener('offline', callback)
    }
  },
  () => navigator.onLine,
  () => true
)
Example B: tiny external store
const todos = useSyncExternalStore(
  todoStore.subscribe,
  todoStore.getSnapshot,
  todoStore.getServerSnapshot
)
useInsertionEffect — CSS-in-JS library hook
Example A: insert a style rule
useInsertionEffect(() => {
  const style = document.createElement('style')
  style.textContent = rule
  document.head.append(style)
  return () => style.remove()
}, [rule])
Example B: register atomic CSS
useInsertionEffect(() => styleRegistry.add(className, css), [className, css])Application code almost never needs this hook; it exists mainly for styling libraries.
12. React 19 actions and resource hooks—two examples each
useActionState — state driven by a form action
Example A: validation
async function save(previous, formData) {
  const name = formData.get('name')
  if (!name) return { error: 'Name is required' }
  return { message: `Saved ${name}` }
}
const [state, formAction, pending] = useActionState(save, {})

<form action={formAction}>
  <input name="name" />
  <button disabled={pending}>Save</button>
  <p>{state.error || state.message}</p>
</form>
Example B: quantity action
async function updateQuantity(previous, formData) {
  const quantity = Number(formData.get('quantity'))
  return await api.updateCart({ quantity })
}
const [cart, updateCart, isPending] = useActionState(updateQuantity, initialCart)
useOptimistic — show an immediate temporary result
Example A: optimistic message
const [optimisticMessages, addOptimistic] = useOptimistic(
  messages,
  (current, text) => [...current, { id: 'pending', text, sending: true }]
)
async function send(formData) {
  const text = formData.get('message')
  addOptimistic(text)
  await saveMessage(text)
}
Example B: instant like count
const [optimisticLikes, addLike] = useOptimistic(likes, n => n + 1)
async function like() {
  addLike()
  await api.like(postId)
}
use — read a Promise or context resource
Example A: promise data under Suspense
function Comments({ commentsPromise }) {
  const comments = use(commentsPromise)
  return comments.map(c => <p key={c.id}>{c.body}</p>)
}

<Suspense fallback={<p>Loading…</p>}>
  <Comments commentsPromise={promise} />
</Suspense>
Example B: conditional context read
function Heading({ showTheme }) {
  if (!showTheme) return <h2>Plain</h2>
  const theme = use(ThemeContext)
  return <h2 className={theme}>Themed</h2>
}
use is a React API with hook-like behavior and special rules. Promise integration is
especially relevant with frameworks and Suspense-enabled data sources.
useFormStatus — inspect a parent form submission (react-dom)
Example A: pending submit button
import { useFormStatus } from 'react-dom'

function SubmitButton() {
  const { pending } = useFormStatus()
  return <button disabled={pending}>{pending ? 'Saving…' : 'Save'}</button>
}

<form action={saveStudent}>
  <input name="name" />
  <SubmitButton />
</form>
Example B: show the value currently being submitted
function SubmissionStatus() {
  const { pending, data } = useFormStatus()
  if (!pending) return null
  return <p>Submitting {data?.get('email')}…</p>
}
The component calling useFormStatus must be inside the form it observes; it cannot observe
a form returned by that same component.
13. Custom hooks
A custom hook packages reusable stateful logic. Its name must begin with use.
Example 1: useLocalStorage
function useLocalStorage(key, initialValue) {
  const [value, setValue] = useState(() => {
    const saved = localStorage.getItem(key)
    return saved ? JSON.parse(saved) : initialValue
  })

  useEffect(() => {
    localStorage.setItem(key, JSON.stringify(value))
  }, [key, value])

  return [value, setValue]
}
Example 2: useOnlineStatus
function useOnlineStatus() {
  return useSyncExternalStore(
    notify => {
      addEventListener('online', notify)
      addEventListener('offline', notify)
      return () => {
        removeEventListener('online', notify)
        removeEventListener('offline', notify)
      }
    },
    () => navigator.onLine,
    () => true
  )
}
14. Data fetching: Fetch and Axios
Fetch API: GET with loading, error and cancellation
useEffect(() => {
  const controller = new AbortController()

  async function load() {
    try {
      setLoading(true)
      const response = await fetch(
        'https://jsonplaceholder.typicode.com/users',
        { signal: controller.signal }
      )
      if (!response.ok) throw new Error(`HTTP ${response.status}`)
      setUsers(await response.json())
    } catch (error) {
      if (error.name !== 'AbortError') setError(error.message)
    } finally {
      setLoading(false)
    }
  }
  load()
  return () => controller.abort()
}, [])
Fetch API: POST
const response = await fetch('/api/students', {
  method: 'POST',
  headers: { 'Content-Type': 'application/json' },
  body: JSON.stringify({ name: 'Avinash' })
})
if (!response.ok) throw new Error('Save failed')
const created = await response.json()
Axios setup
npm install axios// src/services/api.js
import axios from 'axios'
export const api = axios.create({
baseURL: 'https://jsonplaceholder.typicode.com',
timeout: 10000
})
api.interceptors.request.use(config => {
const token = localStorage.getItem('token')
if (token) config.headers.Authorization = `Bearer ${token}`
return config
})Axios GET and POST
const { data } = await api.get('/users')
setUsers(data)

const { data: created } = await api.post('/posts', {
  title: 'React',
  body: 'From zero to infinity',
  userId: 1
})| Fetch | Axios |
|---|---|
| Built into browsers | Install a package |
Check response.ok yourself |
Rejects non-2xx responses by default |
Call response.json() |
Parsed data in response.data |
| AbortController | AbortController supported |
| Simple and dependency-free | Convenient interceptors, defaults and transformations |
15. React Router
npm install react-router-domimport { BrowserRouter, Routes, Route, Link, Outlet, useParams } from 'react-router-dom'
function Layout() {
return (
<>
<nav><Link to="/">Home</Link> <Link to="/students">Students</Link></nav>
<Outlet />
</>
)
}
function Student() {
const { id } = useParams()
return <h2>Student {id}</h2>
}
function App() {
return (
<BrowserRouter>
<Routes>
<Route element={<Layout />}>
<Route path="/" element={<Home />} />
<Route path="/students" element={<Students />} />
<Route path="/students/:id" element={<Student />} />
<Route path="*" element={<NotFound />} />
</Route>
</Routes>
</BrowserRouter>
)
}Use Link for internal navigation, useNavigate after an action,
useSearchParams for query strings and nested routes for shared layouts.
16. Redux Toolkit: predictable global state
Use local state first. Use context for stable, broadly shared values such as theme or authentication. Consider Redux Toolkit when many distant components coordinate complex updates and you need excellent debugging.
npm install @reduxjs/toolkit react-redux1. Create a slice
// src/features/counter/counterSlice.js
import { createSlice } from '@reduxjs/toolkit'

const counterSlice = createSlice({
  name: 'counter',
  initialState: { value: 0 },
  reducers: {
    increment: state => { state.value += 1 },
    addBy: (state, action) => { state.value += action.payload }
  }
})

export const { increment, addBy } = counterSlice.actions
export default counterSlice.reducer
2. Configure the store
// src/app/store.js
import { configureStore } from '@reduxjs/toolkit'
import counterReducer from '../features/counter/counterSlice'

export const store = configureStore({
  reducer: { counter: counterReducer }
})
3. Provide the store
import { Provider } from 'react-redux'
import { store } from './app/store'

createRoot(document.getElementById('root')).render(
  <Provider store={store}><App /></Provider>
)
4. Read and dispatch
import { useDispatch, useSelector } from 'react-redux'
import { increment } from './counterSlice'

function Counter() {
  const value = useSelector(state => state.counter.value)
  const dispatch = useDispatch()
  return <button onClick={() => dispatch(increment())}>{value}</button>
}
Async thunk
export const fetchStudents = createAsyncThunk(
  'students/fetchStudents',
  async (_, { signal }) => {
    const response = await fetch('/api/students', { signal })
    if (!response.ok) throw new Error('Could not load students')
    return response.json()
  }
)

extraReducers: builder => {
  builder
    .addCase(fetchStudents.pending, state => { state.status = 'loading' })
    .addCase(fetchStudents.fulfilled, (state, action) => {
      state.status = 'succeeded'
      state.items = action.payload
    })
    .addCase(fetchStudents.rejected, (state, action) => {
      state.status = 'failed'
      state.error = action.error.message
    })
}
Redux Toolkit Query (RTK Query)
export const studentsApi = createApi({
  reducerPath: 'studentsApi',
  baseQuery: fetchBaseQuery({ baseUrl: '/api/' }),
  tagTypes: ['Student'],
  endpoints: builder => ({
    getStudents: builder.query({
      query: () => 'students',
      providesTags: ['Student']
    })
  })
})

export const { useGetStudentsQuery } = studentsApi
17. Professional architecture
src/
├── app/
│   ├── store.js
│   └── router.jsx
├── assets/
├── components/          # shared UI
├── features/
│   └── students/
│       ├── components/
│       ├── hooks/
│       ├── studentsApi.js
│       ├── studentsSlice.js
│       └── StudentPage.jsx
├── hooks/               # truly shared hooks
├── layouts/
├── pages/
├── services/
├── styles/
├── utils/
├── App.jsx
└── main.jsx
Keep code near the feature that owns it. Avoid one enormous components folder. Keep secrets
off the client; Vite variables exposed to browser code use the VITE_ prefix and are visible to
users.
Continue with the dedicated React file and folder structure lesson.
18. Error handling, testing and performance
Error boundary
Error boundaries catch rendering errors below them. At present they are class components unless supplied by a library.
class ErrorBoundary extends React.Component {
  state = { failed: false }
  static getDerivedStateFromError() { return { failed: true } }
  componentDidCatch(error, info) { console.error(error, info) }
  render() {
    return this.state.failed ? <h2>Something went wrong.</h2> : this.props.children
  }
}
Testing with Vitest and React Testing Library
npm install -D vitest jsdom @testing-library/react @testing-library/jest-dom @testing-library/user-eventtest('increments the counter', async () => {
const user = userEvent.setup()
render(<Counter />)
await user.click(screen.getByRole('button', { name: /count/i }))
expect(screen.getByRole('button')).toHaveTextContent('1')
})Performance order
- Measure with React DevTools Profiler.
- Keep state close to where it is used.
- Avoid unnecessary effects and duplicated state.
- Split large bundles with
lazyandSuspense. - Only then use
memo,useMemooruseCallback.
const AdminPage = lazy(() => import('./pages/AdminPage'))

<Suspense fallback={<p>Loading page…</p>}>
  <AdminPage />
</Suspense>
19. Build and publish to GitHub Pages
GitHub Pages can host the production version of a Vite React application. Do not upload
node_modules, and do not publish the raw src folder. GitHub Actions will install
the packages, run Vite, and publish the generated dist folder whenever you push to
main.
Step 1: test the production build locally
npm run build
npm run preview
Open the preview address displayed in the terminal. Fix build errors before continuing.
Step 2: set Vite's base path
If the repository is named react-zero-infinity and its site address will be
https://USERNAME.github.io/react-zero-infinity/, update vite.config.js:
import { defineConfig } from 'vite'
import react from '@vitejs/plugin-react'

export default defineConfig({
  plugins: [react()],
  base: '/react-zero-infinity/',
})'/REPOSITORY-NAME/' for a project
site. Use '/' for USERNAME.github.io or a custom domain such as
react.learnwithchampak.live. The spelling and capitalisation must match the repository name.
Step 3: add the GitHub Pages workflow
Create .github/workflows/deploy.yml in the project root:
name: Deploy React site to GitHub Pages

on:
  push:
    branches: [main]
  workflow_dispatch:

permissions:
  contents: read
  pages: write
  id-token: write

concurrency:
  group: pages
  cancel-in-progress: true

jobs:
  build:
    runs-on: ubuntu-latest
    steps:
      - name: Check out repository
        uses: actions/checkout@v4

      - name: Set up Node.js
        uses: actions/setup-node@v4
        with:
          node-version: 22
          cache: npm

      - name: Install packages
        run: npm ci

      - name: Build with Vite
        run: npm run build

      - name: Configure GitHub Pages
        uses: actions/configure-pages@v5

      - name: Upload built site
        uses: actions/upload-pages-artifact@v3
        with:
          path: ./dist

  deploy:
    environment:
      name: github-pages
      url: ${{ steps.deployment.outputs.page_url }}
    runs-on: ubuntu-latest
    needs: build
    steps:
      - name: Publish
        id: deployment
        uses: actions/deploy-pages@v4
Step 4: create the repository and push the project
Create an empty GitHub repository named react-zero-infinity. Do not add another README if the
local project already contains files. Then run:
git init
git add .
git commit -m "Create React course project"
git branch -M main
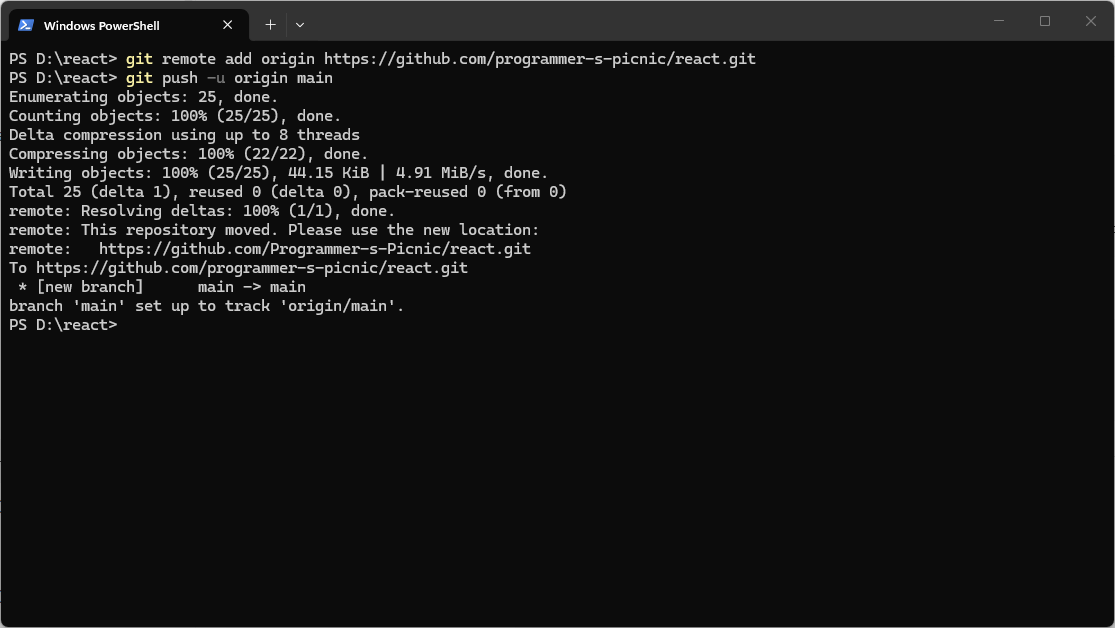
git remote add origin https://github.com/USERNAME/react-zero-infinity.git
git push -u origin main
Replace USERNAME with your GitHub username.
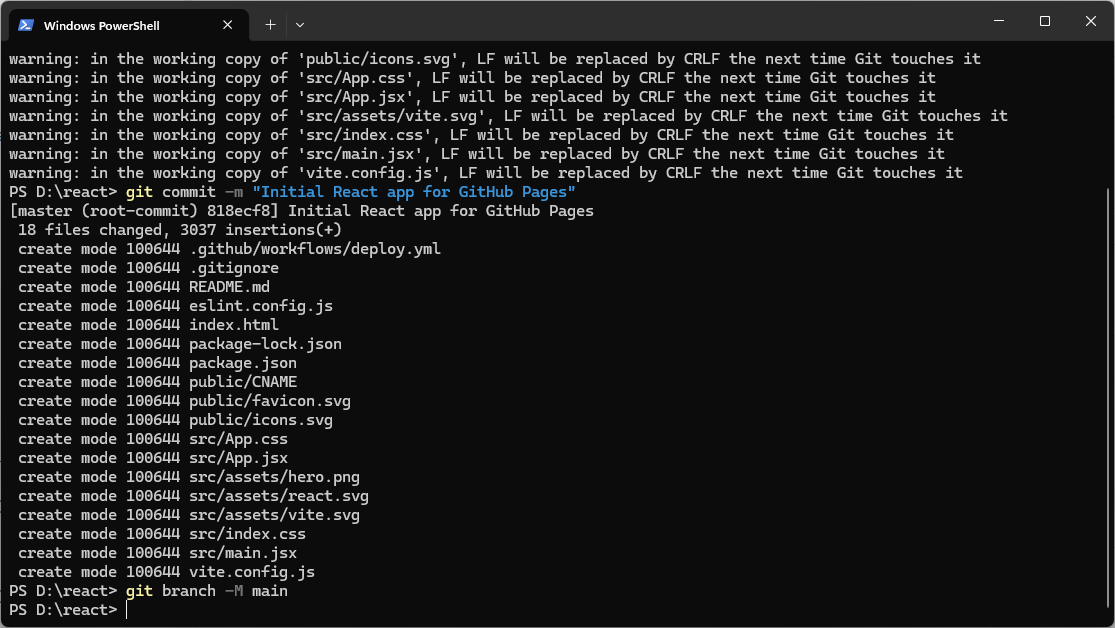
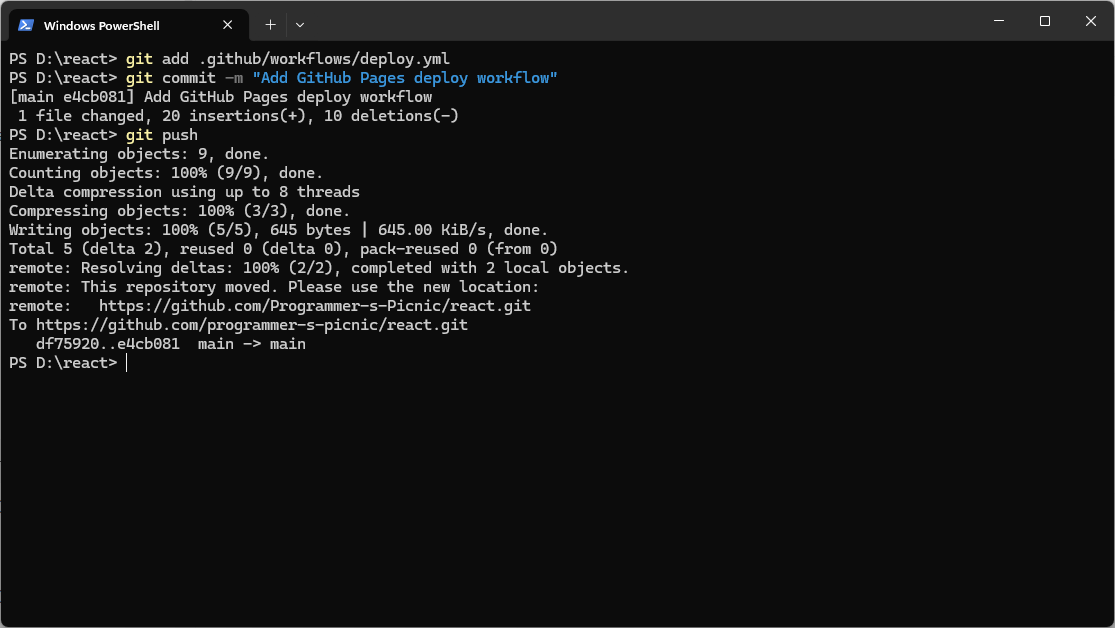
Original Git and publishing screenshots
Step 5: enable GitHub Pages
- Open the repository on GitHub.
- Select Settings → Pages.
- Under Build and deployment, set Source to GitHub Actions.
- Open the Actions tab and wait for “Deploy React site to GitHub Pages” to finish.
- Open
https://USERNAME.github.io/react-zero-infinity/.
git add .
git commit -m "Update React project"
git pushReact Router on GitHub Pages
GitHub Pages cannot normally redirect an unknown path such as /courses/7 to React's
index.html. The simplest reliable course solution is a hash router:
import { createHashRouter, RouterProvider } from 'react-router-dom'

const router = createHashRouter([
  { path: '/', element: <Home /> },
  { path: '/courses', element: <Courses /> },
  { path: '/courses/:courseId', element: <CourseDetails /> },
])

createRoot(document.getElementById('root')).render(
  <RouterProvider router={router} />
)
The address will contain #, for example .../react-zero-infinity/#/courses, but
opening or refreshing a route will work. A custom 404.html redirect is another option, but it
adds complexity.
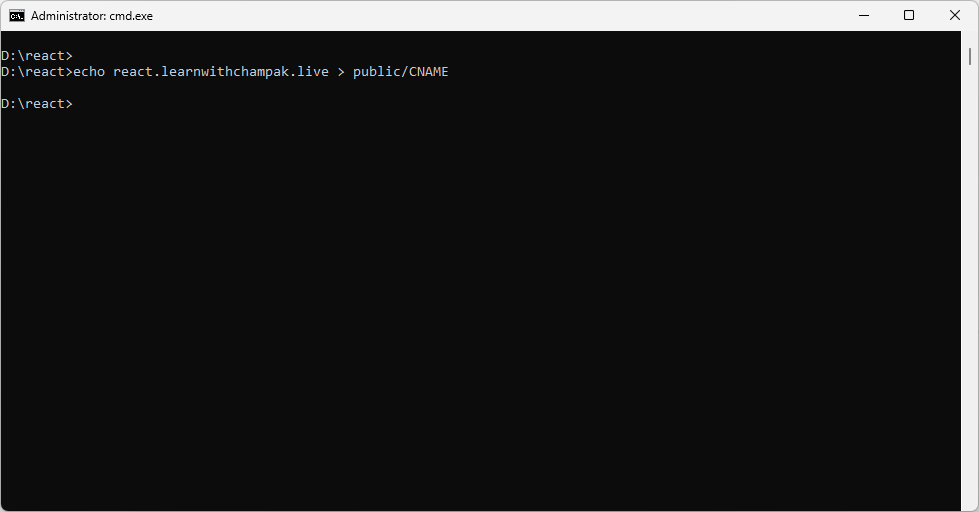
Optional custom domain
For a domain such as react.learnwithchampak.live, set base: '/', enter the domain
under Settings → Pages → Custom domain, and configure the required DNS record with the
domain provider. Put a file named CNAME inside public so Vite copies it into every
build:
react.learnwithchampak.liveCommon GitHub Pages problems
| Problem | Likely cause | Fix |
|---|---|---|
| Blank page | Wrong Vite base |
Use the exact repository path and push again. |
| CSS or JavaScript returns 404 | Assets point to /assets instead of the project path |
Correct base; avoid hard-coded root asset URLs. |
Workflow fails at npm ci |
package-lock.json is missing or outdated |
Run npm install locally and commit the lock file. |
| Refreshing a route shows 404 | BrowserRouter needs server rewrites |
Use createHashRouter or add a tested 404 fallback. |
| Site shows an old version | Deployment still running or cached | Check Actions, then hard-refresh the page. |
Final publication checklist
- No console errors or exposed secrets.
- Loading, empty and error states exist.
- Keyboard navigation, labels, contrast and responsive layouts work.
npm run buildcompletes locally.- The workflow has a green tick in GitHub Actions.
- Images, CSS, lazy-loaded modules and routes work from the published URL.
20. Projects from zero to infinity
Level 1: Student counter
State, events, conditional messages and reset.
Level 2: Task manager
Forms, lists, filtering, local storage and custom hooks.
Level 3: Course browser
Router, Fetch/Axios, loading, errors, search and pagination.
Level 4: Learning portal
Authentication UI, protected routes, Redux Toolkit, API mutations and tests.
Capstone requirements
- Feature-based folders.
- At least five routes and one dynamic route.
- Accessible controlled forms with validation.
- Real API with cancellation and error handling.
- Local state, context, a custom hook and justified Redux usage.
- Unit/component tests, lazy loading and a production build.
21. Knowledge check
Where to practise
Type every example in your Vite project. Change names, values and API endpoints. A lesson becomes a skill only after you predict what the code will do, run it, and explain the result in your own words.